“Take the next little step-
the smaller you make it,
the more likely you'll take it..”
**Today's post is FULL of photos
Welcome to my Art Journaling Love class...so happy you are here!
It's Week Two and time to talk gesso!!
I love it so much I buy it BIG!
 |
| I buy this at Michaels and use their 40% coupon. It will last a LONG time! |
What the heck is gesso anyway...Wikipedia says this...
Gesso is a white paint mixture consisting of a binder mixed with chalk, gypsum, pigment, or any combination of these. It is used in artwork as a preparation for any number of substrates such as wood panels, canvas and sculpture as a base for paint and other materials that are applied over it.
To put it simple...gesso is a nice, thick paint that adds a base to your art journals and allows for LOTS of layers to be put on your pages. It also is a GREAT way to add TEXTURE to your work.
Today I am going to show you several ways you can do that.
Depending on how many pages I plan on working on
at one sitting will depend on how much gesso I pour into my container.
(i use a take-out container with a lid
in case I have any left over to use another time)
I then take a good amount out
with my paintbrush and put on my journal page.
I use an old motel key card to spread it all over my page.
If I don't plan on using any tools to add texture I won't use as much gesso...a thin coat is really all you need.
However, since I knew I would be demonstrating
texture today I laid the gesso on thick.
These are just a sample of the tools you can use to create beautiful
roughness and dimension to your work.
After I spread the gesso with the motel card I used a fork to
pull the thick paint across my page.
Don't you just LOVE the look??
And here is what it looks like with paint...
The Hearts were creating using this...
It's a stick used for shish-ka-bobs.
You can find these at Wal-Mart.
You can also write words in your gesso with these just like a pencil.
Here's an example using the stick then adding neon green paint with my finger...
Along with spreading the gesso the motel card makes a
great texturizer...
Just hold it upright and make criss-cross lines, squares, etc.
across your page,
Once that dries add paint...
Fantastic, right?? It looks old and weathered...perfect!
Another way to use gesso is with stamps...
Again spread a nice, thick amount of gesso across your page...
Then stamp directly into the wet gesso.
I stamped "hello" three times and used the flower stamp
randomly on the page. It still had blue ink on it so that's why the flowers are blue...
I really like it!!!
Once dry I painted over the page with purple acrylic paint
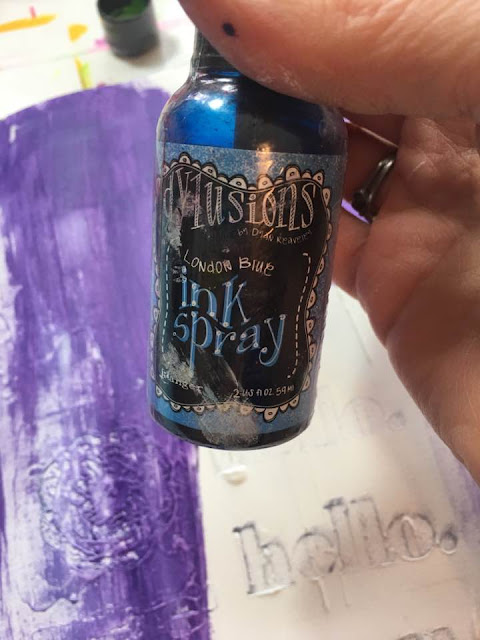
and London Blue spray ink.
Just a spray or two is all you need...
then add water to the ink...
Spraying the water on the ink makes it run down the page...
It's delightful!!
 |
| See the flower stamp on the left?? LOVE IT! |
So after the blue ink had dried I decided to add black paint
to the HELLO I had stamped in gesso...
I HATED it.
Ugh.
So much.
But that's ok because you know what else gesso is GREAT for??
Covering up your mistakes!!!
I put a good amount of gesso on my mistake
then took a palette knife to cover.
See? No more mistake!
I then took a bottle of Fresh Lime spray ink
and brightened up the page...
You can still see a bit of the black
but I LOVE that green!!!
Adds so much to the page.
I think this may be my new fave color combo!!
So as I look at the page I keep obsessing about how much I can still see the black so I add this...
One of my handmade embellishments highlighted with a stabilo pencil and water along with a nearly dry black ink pad to rub over my HELLO.
BETTER!!!
LOOK at this stencil! I LOVE it! It's by the famous Dina Wakley...
so much goodness here!!
Take a stencil...
and place it over your page...wherever you want it to go.
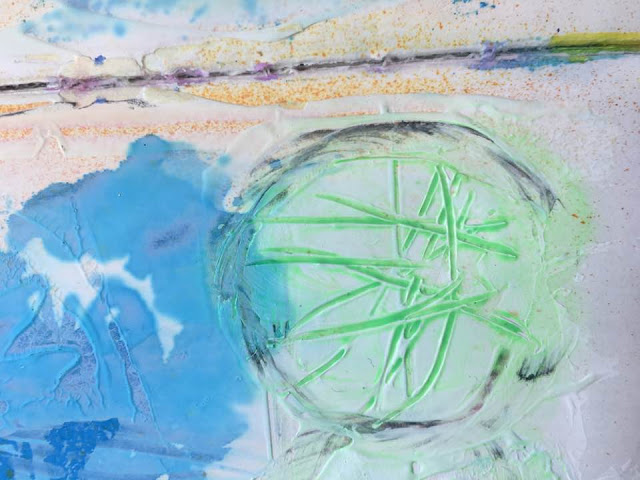
Then take a palette knife with LOTS of gesso on it...
And smooth the knife across the stencil.
In this case I only wanted to use the dots.
You really want to lay the gesso on THICK.
This is NOT the time to be stingy with your gesso!!
Pull the stencil carefully away from your page and LOOK!
GORGEOUS raised texture!!!
The reason it is mixed with some purple/pink colors
is I NEVER clean my stencils
so that is residue
from spray inks.
I like that though!!
Here is another stencil used in that same way on that same page...
On the top left.
I added more ink to dots along with a neon red.
Here is another example of texture and gesso...
And did you know there is BLACK gesso??
It is divine!
Everything we did with the white gesso you can do with the black...
It's such a fun way to use my favorite bright, cheery colors!!!
This page background is mostly gesso with just a few
sprays of ink and water.
So as you can see gesso is a MUST in your art journals
and other mixed-media projects!!
If you want to try it out you can buy a small tube at Wal-Mart for under $5! So WORTH it!
Ok now on to my
favorite ways I add Words and
phrases to my art journal pages...
Remember these...
They were all the rage back in my scrapbooking days.
I almost got rid of them at a yard sale several years
until inspiration struck.
Why can't I use these in my journals??
Now I am obsessed and am always on the lookout for new fonts.
To create my first page I am using a stencil by Teresa Collins Design. This is my go-to font I tell you. LOVE IT!!
Of course I put my paper and the stencil backwards...
So I can trace the letter with a pencil and not have
any lines show.
By the way I use my OWN paper for all my letters.
For these letters I am using this paper.
I will be showing you how I make my paper, embellishments
and winged Angel Girls next week!
I am using the phrase Free to Love inspired by our class Word List from the week...FREE.
Here is what my letters look like so far laid out on my journal page.
Recognize this page? It's the gesso and fork method...lol!!
I also used a stick to draw three hearts.
Using my go-to journal pen
Fude Ball...
I drew in the indented lines.
Not liking the starkness of the lines I took my small brush and dotted around the hearts with white paint.
You can use the gesso, too!
To my page I added patterned stamps..
And one of my winged Angel Girls.
To make my letter pop and not just lay on the page
I took my Fude Ball and outlined each letter.
Here is the finished page...
Here are more examples using letter stencils and
my own paper...
I hope you have learned something new and fun to bring
a different look and feel to your journals.
I LOVE sharing with you
and am
so GRATEFUL you are here!!
Join my FB group here.


Don’t know how old this post is but I have just discovered you through Pinterest wandering. And WOW! Love what you are doing and I am so inspired by you. I’m not much of a Facebooker these days because like you posted elsewhere, it’s a whole lot of comparison leading to self doubt. Much healthier in small doses. Anyhow...thank you, keep creating! I am beginning art journaling with my 14 year old and staring with your 52 week class. Again, thank you and may God bless you greatly.
ReplyDeleteI admire this article for the well-researched content and excellent wording. I got so involved in this material that I couldn’t stop reading. I am impressed with your work and skill. Thank you so much. finding an affordable virtual office solution
ReplyDelete